DanceForms Exercises are From: The Practical Guide (see the PDF)
Handout #05
Part B of the Practical Guide
Exercise 9 - Moving Body Parts in Combination
Learn to:
1 start a new figure
2 name the basic plans of motion and the basic movement directions
Combo motion: Upper Arm & Leg with Lower Arm & Leg
Open the file: Exercise9.lfa
This would really hurt - on a human being.
We want something which looks humanely possibleTo get the lower arm and/or the lower leg to approximate this type of position, you have to move the respective upper limb as well
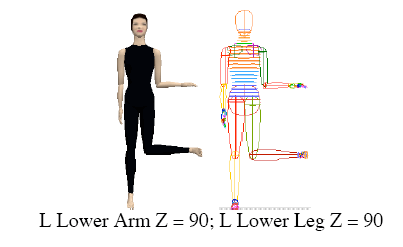
- In the first example we are going to move the lower arm and the lower leg directly outward
- Note that neither the knee nor the elbow hinges directly outward
- This means you will need to rotate the upper arm, and/or upper leg
1 |
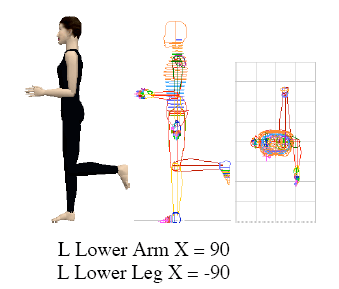 |
Set the X plane to +90 degrees to move the lower arm forward. Set the X plane to -90 degrees to move the lower leg backward |
2 |
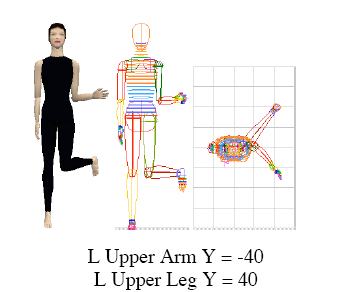 |
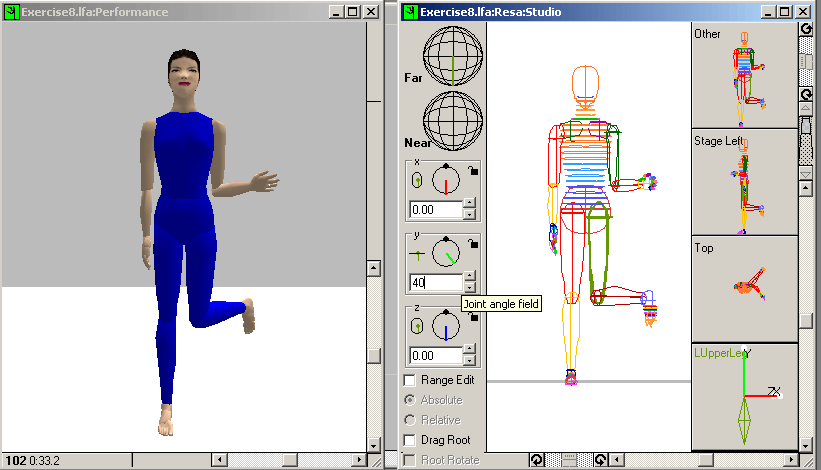
Set the Y plane to -40 degrees to rotate the upper arm outward and back which causes the lower arm to swing out. Set the Yplane to +40 to rotate the upper leg inward, which lets the lower leg (in back) to swing out.
|
9a - Fist on Hip
|
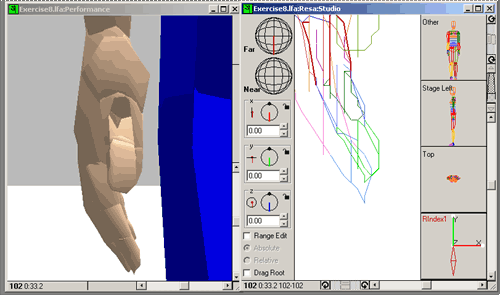
Here is the starting position - neutral
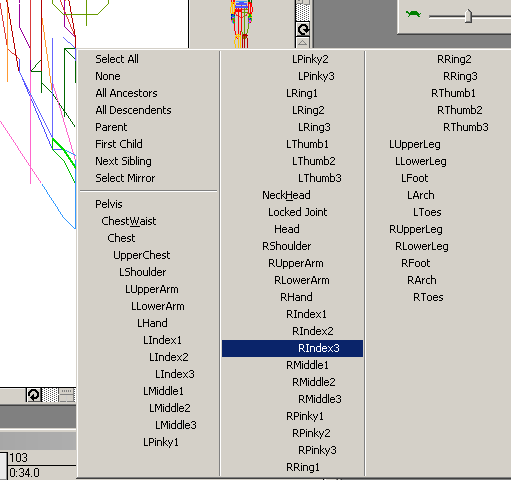
Hold the mouse down (left click and hold) in the Studio window until
the part selection popup menu appears.
Then choose the farthest part of one of the fingers (we will be repeating
this for each finger)
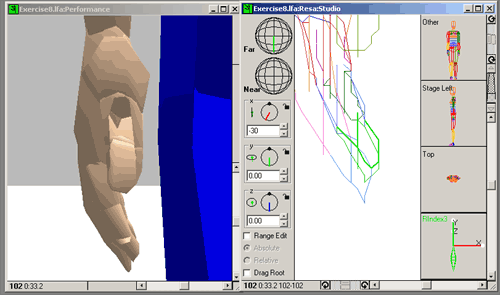
In the X plane set an angle to curl this part of the finger inward
(here it is a -30 to make the illustration clear, but look at your own fist
to get an idea of the best angle.) Then select the next inward part (here
it will be RIndex2)
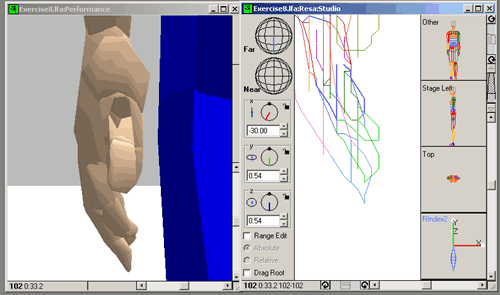
In the X plane set an angle to curl this part of the finger inward
(here it is a -30 to make the illustration clear, but look at your own fist
to get an idea of the best angle.) Then select the next inward part (here
it will be RIndex1)
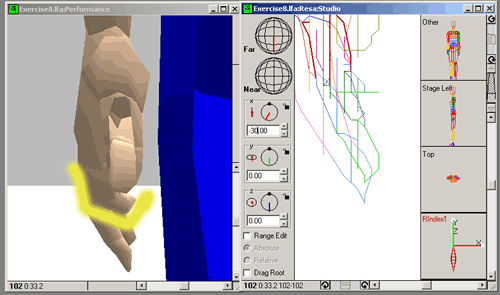
In the X plane set an angle to curl this part of the finger inward
(here it is a -30 to make the illustration clear, but look at your own fist
to get an idea of the best angle.) Note the yellow line to help illustrate
the three finger parts, each of which has now been turned inward by a some
number of degrees.
Then select another finger's outermost part and Repeat the succession of angle settings for each part of that finger. Do this until you've covered all the fingers in this hand. You might also want to bring in the thumb just a little (but don't fold it inside the fist).
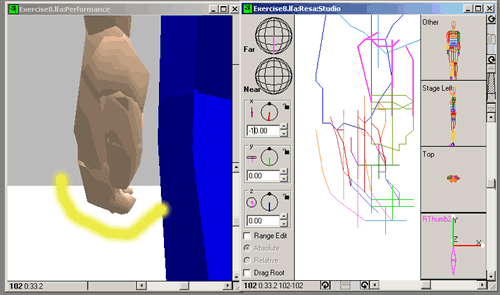
Now we have fist and it is time to move up the arm.
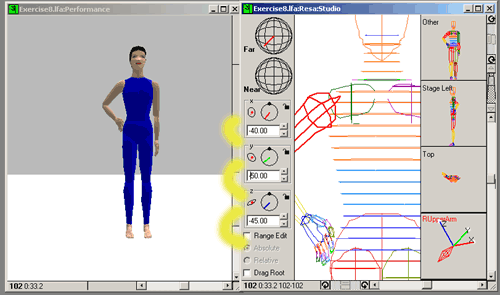
At this point we've gone through several transitions moving up the arm from the hand. This panel shows the upper arm adjustments - there will be three of them.
After the fingers:
Bend the Elbow: do the position yourself and estimate how much to move the lower arm (hint: more than 90, less than 180)
Upper Arm: (See illustration just above)
1 - Move upper arm outward (Z axis)
2 - Move upper arm backward (X axis)
3 - Rotate upper arm inward (Y axis) until the fist is on the hip
9b - Retiré
1 Point the foot: Change the X-box (X-axis) values for these parts:
Toes (unlike the fingers, the toes are manipulated as a
group)
Arch
Foot
Experiment until you like the curve of the foot.
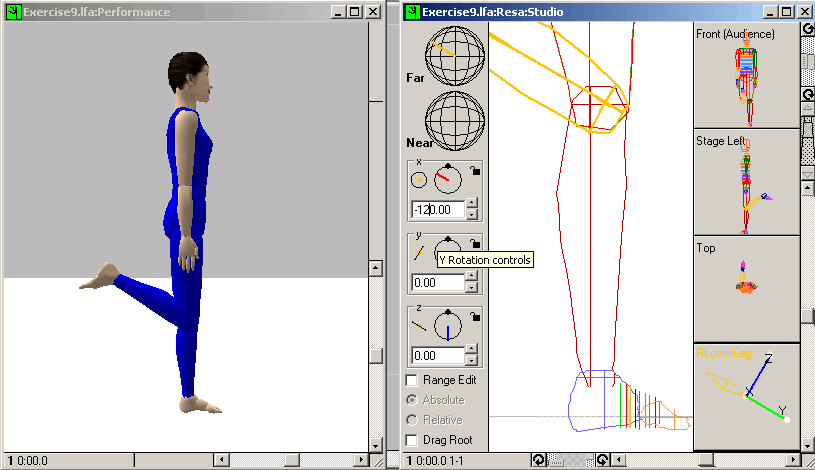
2 Bend the knee (hint: about 120 degrees)
3 Move the upper leg outward (Z-axis)
4 Move the upper leg just a little in front of the body (X-axis)
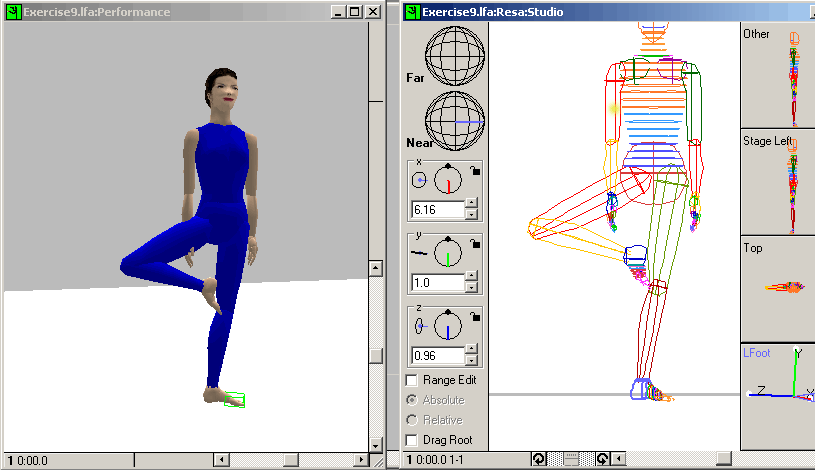
5 Rotate the upper leg outward (Y-axis) until the toe is near the knee (hint: turnout is about 60 degrees from the thigh)
6 Position the arms and place the support leg below the pelvis to
balance the dancer (illusion of pelvic shift)
(remember the "mirror" keyboard command - handy here for the arms
- Control-M )
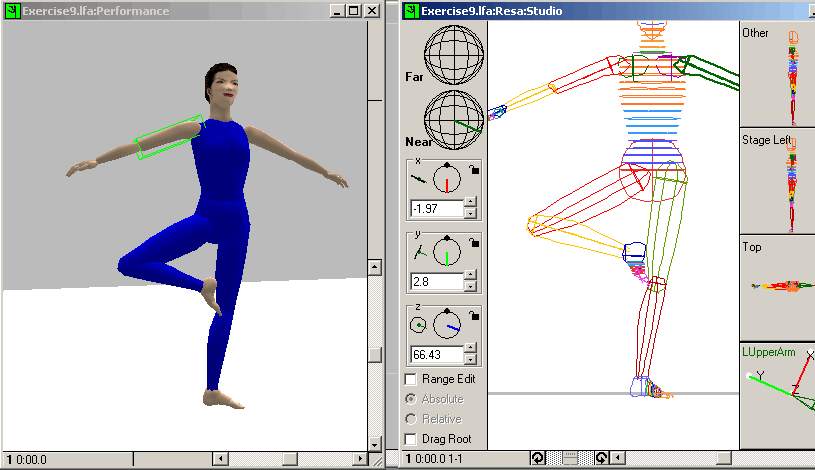
|
To make large adjustments to a body-part position
To make fine adjustments to a body-part position
To change a body-part position in either lateral or sagittal plane
|
9.3 Note on the Near and Far Positioning Globes
In the Studio window the two globes in the upper
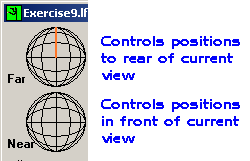
Note: This is relative only to your view, regardless of which body part you art manipulating.
Here are three examples. The first two are from the front view and position the upper arm to the far (away) side and to the near (close) side. The third is a deliberate oops. If you look at a far arm from the other side (here, viewing from the left and moving the right arm) the near globe really means near positioning, even when other body parts, including the body itself, are in the way.
1 |
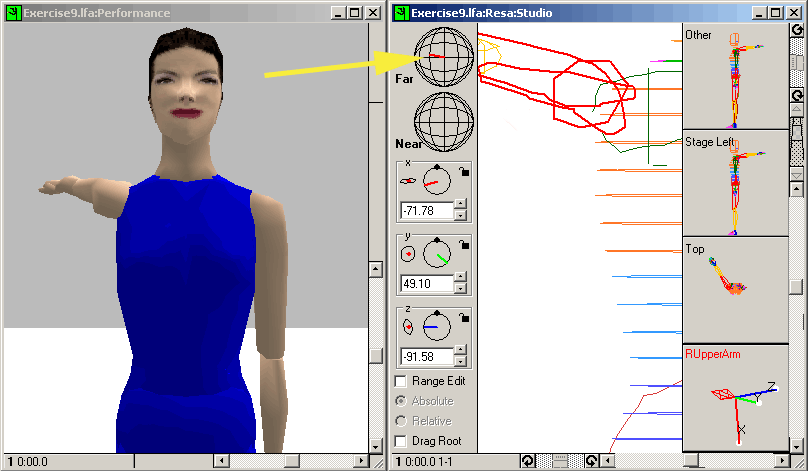 |
View from front Far Globe Arm moves to the rear (which the far position here) |
2 |
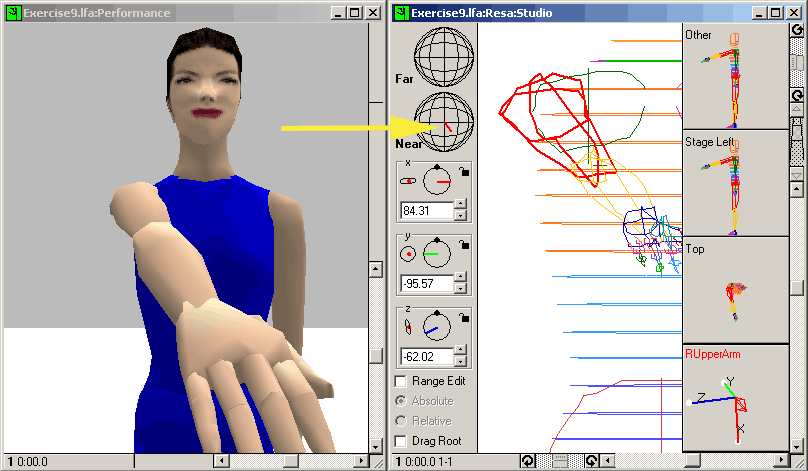 |
View from front Near Globe Arm comes to the front (which is the near position here) |
3 |
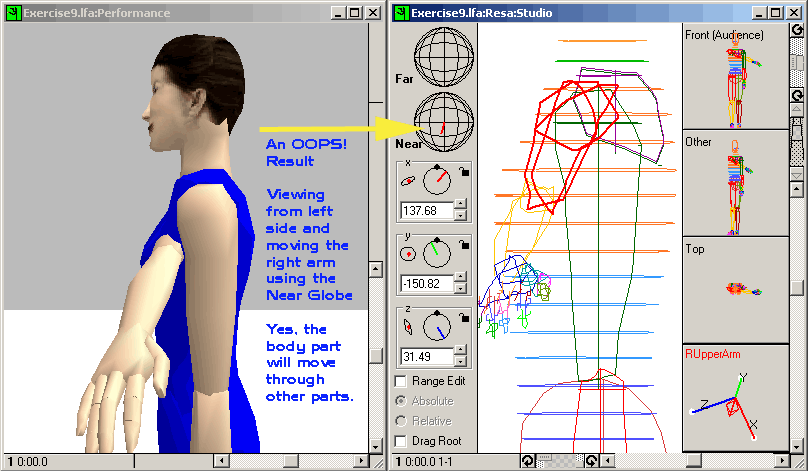 |
View from left side Near Globe Just to check, there are no checks on one part moving through another. |
9.4 Non-Neutral Pelvis Positions
Not the same as Elvis' positions
|
When the pelvis in not in its Neutral Position (such as arabesque)
|
Exercise 9c: ballet arabesque
In order we will adjust these items:
- Position Pelvis
- Erect the torso
- Position support leg
- Position lifted leg
- Point the foot
- Position the arms
Essentially this is the method. Along the way there are a number of fine points to adjust, such as finges on the hands, the toes, arch and foot of the lifted foot, and so forth. Below is a set of illustrations showing these points.
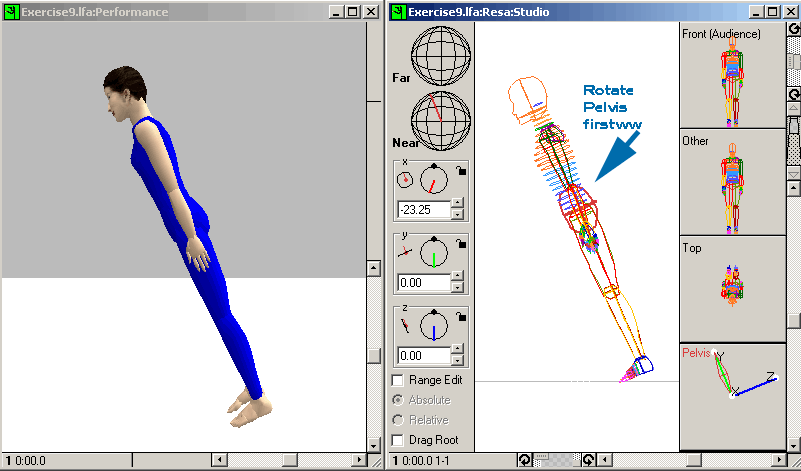
1 |
Rotate the Pelvis (X-axis) along the forward-backward plane. When you rotate from the pelvis, everything rotates, so now we have to go back and adjust the rest, moving outward from the pelvis. |
2 |
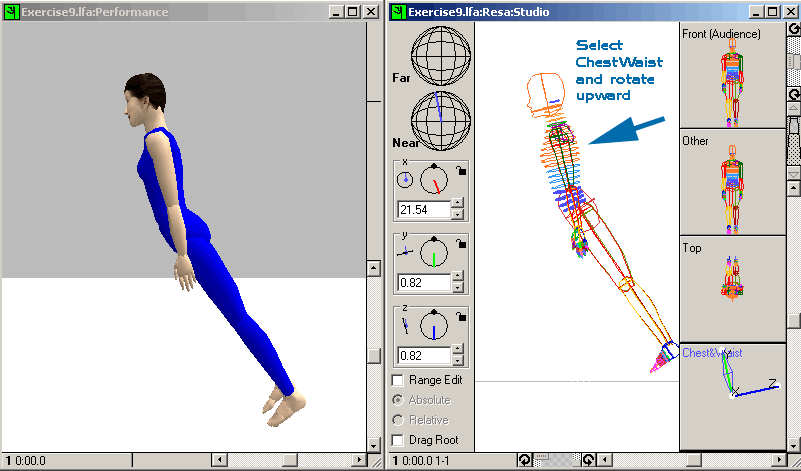
First select the ChestWaist group (use the body parts menu) and rotate it upward (X-axis) |
3 |
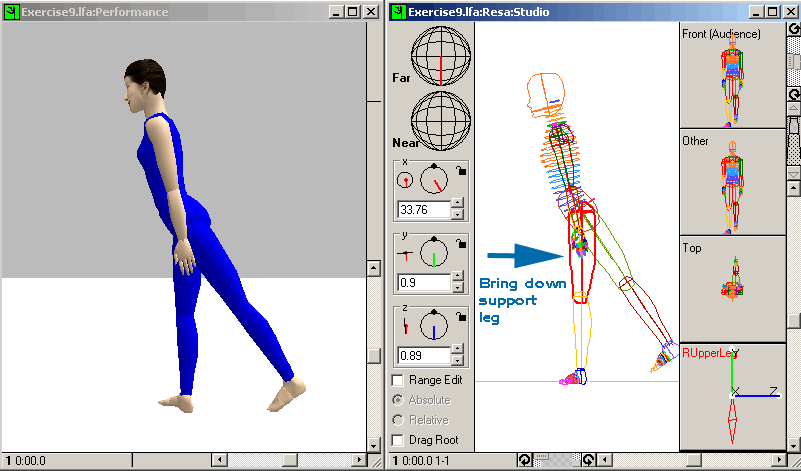
Bring down the support leg (again the X-axis) and adjust the foot position. |
4 |
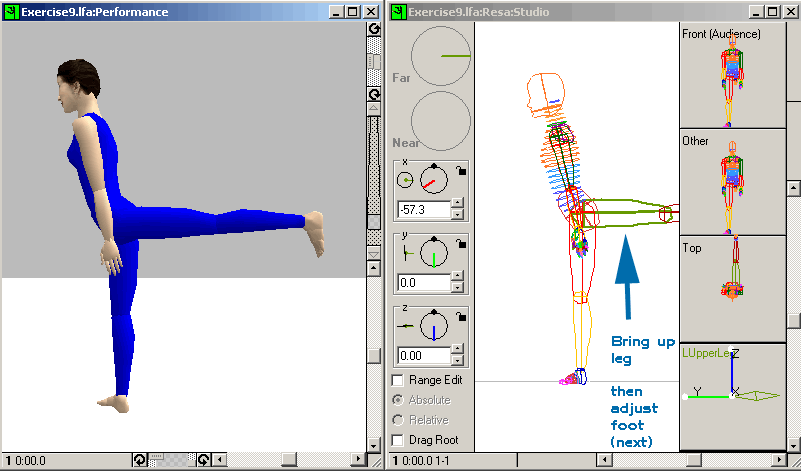
Bring up the lifted leg (X-axis). Now adjust the foot. You will need to point it and to do that you will need to adjust the foot, arc and toes as well as rotate the upper leg. Changing the view in the Performance Window helps you to see what is changing. |
5 |
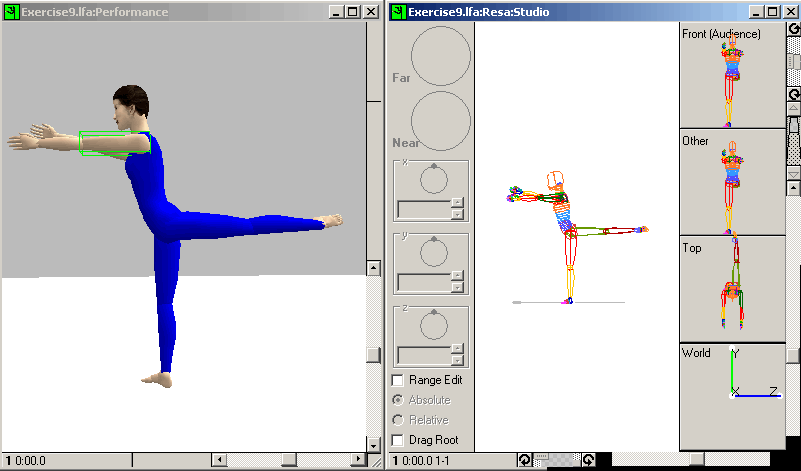
The arms need to be brought up (X-axis) and maybe adjust the fingers. You may want to rotate the upper arms (unlike my example) in order to change the orientation of the hands. When you are done it will look something like this, assuming I haven't "broken" any of her joints. |
9.5 Tweening
Exercise 9d - Halfway positions
File to open: Exercise9CombinedPositions.lfa
- Select the retiré keyframe - Drag across it to create a selection box
- Copy the keyframe (the selected area)
- Paste the keyframe as the next frame (between the current retiré
and the last keyframe
(this is a new keyframe expanding the score (timeline)
For this use you will have to first go to the Edit menu twice to set location and facing
Edit menu ->> Paste Defaults ->> /Absolute Location
Edit menu ->> Paste Defaults ->> Absolute Facing - Double click on the pasted frame to open its Studio window
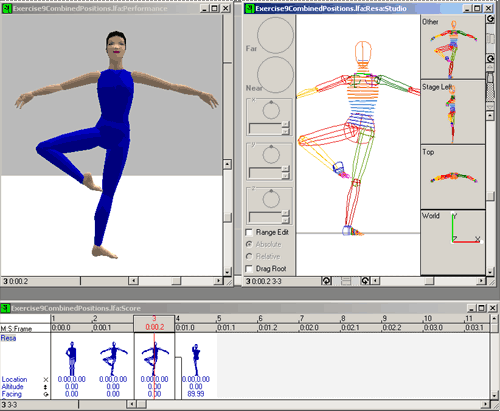
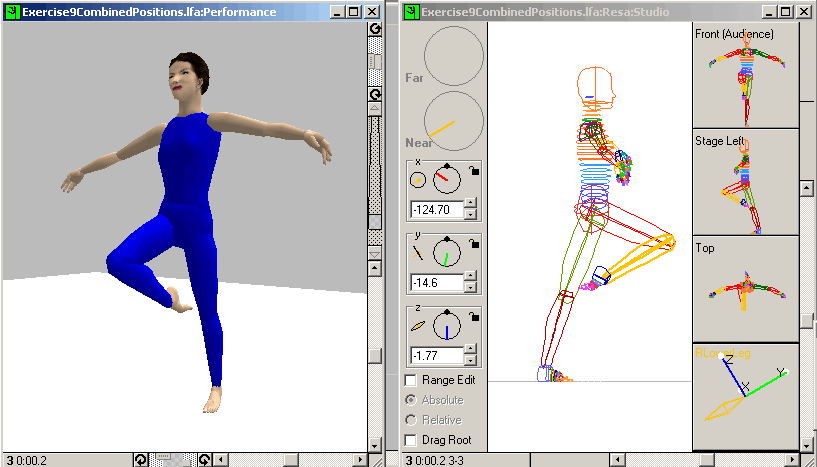
This is what your screen should look like after copy/pasting the orignal retiré keyframe and then double-clicking on the (new) second retiré keyframe.
Now change the dancer's legs to a parallel retiré position
