Digital Video Editing
Cutting on the Beat
Or: cutting it just right
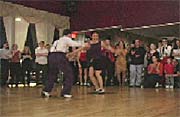
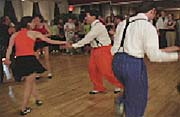
In this exercise we are going to shorten a musical scene, in this case a JAM at Louis and Company in Overland Park. The idea is to position one swing aerial right after another without making it obvious that we are also cutting the sound track. So, we will have to match beats in order to blend the sound as smoothly as possible.
| From a regular saturday swing jam in Overland Park at Louis and Company. | ||
|
|
|
Last Clip |
|
|
 |
|
|
|
|
|
|
||
The Exercise Files
Basic Concepts
- Drop each video file in turn into the video tracks
- Determine where you are going to slice and remove part of the first one
then recombine them
- Reposition the video and audio tracks above and below each other so they overlap each other without intersecting
- Move the audio tracks to get the best (nearest) alignment of "beats" in the music
- Separately fade the ends of both audio tracks to create a blend of beats.
- Keep trying the match by moving the tracks left and right until the sounds seem to blend with as little disruption as possible.
- Fade one or both ends of the video tracks to create a dissolve between the slices
- Determine where you are going to merge each of the next two files onto the end of the previous edit
- Return to step two
As you do this exercise you need to use these three video clips on the CD-ROM
- Video Files from the CD-ROM:
- JamCut_Enter.avi
- JamCut_Louis.avi
- JamCut_Finale.avi
As with any project, start with Text for your name and username. That way I know whose piece this is.
1 - Drop the first clip into the work area. (JamCut_Enter.avi)
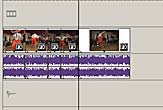
2 - Look for a spot or spots to split the clip. Hit the "S" key to split the tracks at the start and end positions.
3 - Remove the sections of video and audio you don't need by clicking on that event which highlights (selects it) and then hit the "Delete" key.
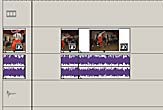
4 - Move the video and audio tracks for the event you wish to use for the first dissolve so that they are above and below, effectively overlapping the starting video.
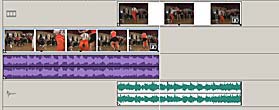
5 - Start widening the clips on the tracks by: 1) placing the edit cursor in the center of the area you want to look at and then 2) using the up arrow on the keyboard to widen (expand) the tracks.
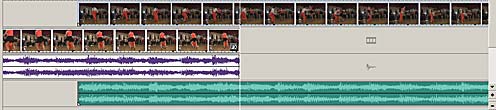
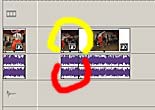
6 - Once you can see the sound-wave pattern well enough to try matching beats in one section of the music with beats in another section of music, move the new (right-most clip) back and forth while you keep playing the clip to listen to the sound.
7 - Fade the audio tracks across each other to create a crossfade.
8 - Fade one or both of the Video Tracks (here the top track is faded in). This fades in the new action over the old action.
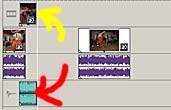
9 - After this we can re-size the track widths.
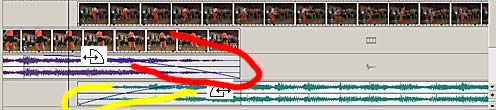
10 - Drag the next video clip into the work area. and slide it in to place. Notice that we are going to use alternate areas on the video tracks so that we can fade each track separately.
11 - Again Expand the width of the work area by placing the cursor in the center of the area you are looking at then hitting the Up-Arrow (remember the Down-Arrow contracts the area).
12 - As you do this, change the boundaries of your clips by heading
to the left or right sides and dragging the boundary inward to fit the needed
size.
-- Play with the position as your play the clip again until the sound is as
smoothly blended as you can get it. Fade the ends of the events to further
smooth out the blend with a crossfade.
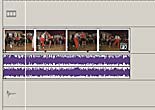
13 - The result looks something like this.
14 - Now click the "Make Movie" button and create a version for the web.
15 - Place the file on your site.
16 - Create a media link from your Assignment Page to this media clip.