Digital Video Editing
Capture, Import, Extract and Copy Files
Related Links: Make Movie, Print To Tape
Getting video files directly from the camera
Saving video from video tape to a file on the hard drive is called "capturing."
Saving video from miniDVD camcorder DVD to files is called "importing."
You can "extract" media files from media in general, such as tracks from music CDs and video from video DVDs.
Copy Files
from the camera hard drive - usually via the USB cable
Copy files from solid state "drive" such as an SXS card, a P2 card, a compact flash card or an SDHC card.
1 of 4: Capture - SD and HDV
Each editor offers its own way of doing captures. Movie Studio uses a separate capture program which is called up as a dialog window from Movie Studio's File Menu.
Pick the "Capture Video" option from the File Menu.
Capture in SD (Standard Def)
As the capture dialog opens another dialog window will open on top of it if you have a camera plugged into the firewire port. Ignore the "possible tape change" message. The dialog will say that no matter what. Just take it as meaning that the capture dialog was able to detect your camera.
In the "Tape Name:" text box enter a short version of whatever you want the names of your capture clips to start with. As a general rule, short, shorter and shorter still is best. If you do long descriptive names here you will have unwieldy file names later.
Click the "OK" button.
Now you have this screen. If you are playing video on the camera it will show up in the preview area.
You should notice:
- The "Capture Video" button on the left
- The "Capture Image" button on the right (for still captures)
- The player buttons
- The "Explorer" window section at the bottom.
It is VERY IMPORTANT to know where your capture files are going. You control this primarily (and easiest) by designating the drive and folder when you start a new project, before you ever get to this capture utility.

Capture in HDV (HiDef Tape - ) - New in Vegas Pro 8 and in Vegas Movie Studio 9
HDV is stored/recorded to the same miniDV tape used in standard def video cameras. Even though the shape of the video has a 16:9 ratio HDV manages to store the 33-percent wider format as a special case of the 4:3 ratio. Even when the camera records full 1920x1080 pixel images (16:9 ratio) it stores it on the tape as 1440x1080 (4:3 ratio). Then on editing and on play back this is expanded horizontally by one-third.
This is very similar to film camera's use of anamorphic lenses, such as on Panavision cameras starting in the 1950's when movies came up with the wide format to compete with the introduction of television which was using the long established 4:3 ratio screen. Panavision used and anamorphic lens to compress the picture horizontally on the film. The projector, then, had a corresponding anamorphic projection lens to spread the film image back to the original taking format on the screen.
The first dialog after choosing "capture" is asks whether you are capturing from a Standard Definition (DV) or a HiDef Camera (HDV). If you are using and HDV camera click the later option.
(note: this really looks like a bit a quick fix with a more integrated HD capture to come along later.)
This brings up the HDV capture dialog.
Click the "Browse" button to locate the disk and folder you want to send the capture files to.
Rename the Clip to something which makes sense to you.
Give the Tape a name.
Click on the round, red, record button to start capturing.
2 of 4: Import Mini DVD from DVD Camcorder
View Video here (pictures below)
Vegas offers a specialized import for DVD camcorders which do not have a firewire connection. Here are the steps.
- initialize (if needed) your DVD in the camcorder
- when done shooting - finalize DVD in the camcorder before removing it
- place camcorder DVD in the DVD drive of your computer
- from within Vegas invoke the File Menu and choose the Import option and then the DVD Camcorder Disc... sub-option.
From here excercise the options on the import dialog
The Source pull-down will automatically list the title for the current DVD. In the same pull-down is an option to browse for the DVD drive - as a selection. If you have more than one DVD drive and the listed one is the wrong one, choose another.
The Destination is the disk drive and folder you want the files to be copied to.
When ready, hit the OK button.
3 of 4: Extract Media (Various)
You can also put other DVDs into the DVD drive to copy, perhaps a DVD you created earlier and you now want to use the files from the DVD to edit. Just remember, even though DVD images on television generally look better than VHS tape, they are usually highly compressed images. If you still have the original miniDV tapes or the original capture files on disk, you are better off using those as your source material.
This is handy for extracting audio from your CDs. See below:
1 - From the File Menu choose the Extract Audio from CD option. This will go looking for a CD in your CD/DVD drives and present you with a list of audio tracks in a window.
Here you have three options. The most typical use is to simply select each track from the CD and hit the OK button. After that you have a set of steps for each file:
1 - file dialog to name the file
2 - gas guage while this is downloading
When this finishes downloading the two-step cycle repeats with the file dialog to name the file and then the gas guage.
4 of 4: Copy from Media Card
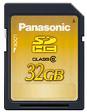
Make sure you have the fastest memory card possible. In this case a
"class 6" card. This allows you to record at the best possible
resolution.
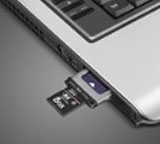
Plug the card into your card reader then use Windows Explorer to view the files on the card (below).
MTS (video) file structure on media card
The illustration above shows HiDef "MTS" files on a media card plugged into a card reader which in turn is plugged into the computer. These are AVCHD-format (.264) files sitting on an SDHC class 6 media card used in a Panasonic HMC-150 camcorder recording in HiDef at 1920x1080 resolution. It could have been from a number of other AVCHD camcorders just as easily.
For video which is sent directly to a media card or which is recorded on the camera's hard drive, this is a file management task. Depending on your setup you will either plug a USB cable into the camera connected to your computer or you will take a memory card out of the camcorder and insert it into the correct type of card reader.
In either case, you will need to use Windows Explorer or "My Computer" (my computer is a subsection of Windows Explorer). This is the file management utility used to find, look at and copy files from one location to another.
In the case above all the actual video files have and "MTS" extension and are located in the STREAM folder. Simply select all the MTS files and copy them to a location on your computer's hard drive. Notice that the MTS files (which are the actual video files) are buried deep in a directory structure on the card. The folder (directory) structure is used for more than mere storage of video takes.
The more involved structure is used during camera operation to keep track of other information about the clips and to control instant re-plays and so forth. For example the AVCHDTN folder has thumbnails used in the display when choosing scenes (clips) to replay. The CLIPINF folder has data about the settings for each of the MTS files in the STREAM folder.
For purposes of video to edit you only need to locate the MTS files. Generally you should never format the card with your computer, do it with the camera. The files system may not be the same (consult the instructions to be sure).
The Media Pool
As you capture each clip the clip (event) is not only stored to disk, it is also added to your project's list of media files. If you pull out the margins of the "Media Pool" tab left and right you will see a lot of columns. They will give you detailed information about each file.
If you see thumbnails
instead of text detail click on the small Explorer viewing button and choose
details.
The small thumbnails chew up memory and also give you less information
about each clip.
This image is in two parts. I've broken the listing in half and put the right half underneath the left side to make it a little easier to fit on the page. (Click for larger picture in new window)
This gives you a good deal of information:
- filename
- the time hack on the original tape where this clip starts from
- how long the clip is
- file size
- Time and date this video clip was recorded on tape (info on tape)
- Time and date this video clip was captured to hard disk
- The Path (location to the folder which holds the file)
When you are done with the captures and have all the clips you want, at least for now. Close out the capture utility. You can always return and add more clips.